Learn How to make Autumn Gumpaste Leaves to dress up all your baked goods this Fall! It’s easier than you think and can be made months ahead!
This post contains affiliate links, which won’t cost you any more to purchase, but does help support this site.
When I’m not sharing yummy recipes here on Family Table Treasures I’m baking up beautiful Custom Cakes out of my home kitchen. Custom Cake Making is an art that I learned years ago.
It started out as a way to make fun birthday cakes for my kids when they were little and turned into making more extravagant custom cakes today.
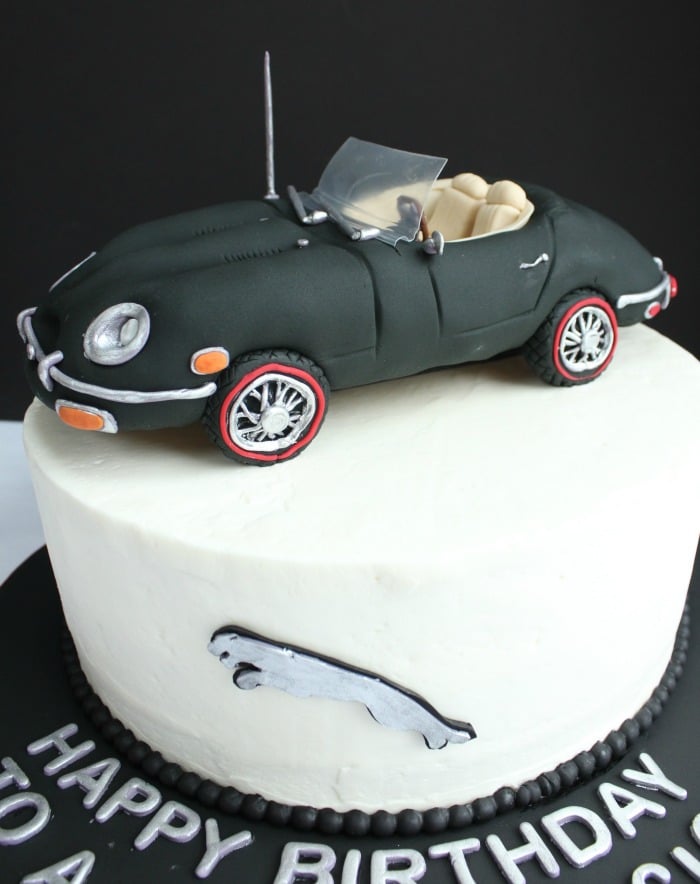
I was recently hired by a friend to make a special birthday cake for her husband. He’s a classic car buff and she wanted me to recreate his very first car restoration in a cake topper. This 1970 Jaguar XKE was carved out of a rice krispie treat and covered in fondant.
How I learned to make Custom Cakes
Almost everything that I have learned about making Custom Cakes was learned right here on the internet. I did learn a few things from books in the very beginning. However, now you can learn just about anything you want to know right here online.
YouTube is a great resource to learn different techniques for making decorations for your cakes. Watching videos can be very helpful when learning something new that’s very detailed. That’s how I learned to make this car.
Before you tackle something as intricate as this car though let’s start with something easy like these real looking Autumn Gumpaste Leaves.
Making these Autumn leaves is much easier than you may think. First, you just need to know a few tips about working with Gumpaste and Fondant.
Why you want to use Gumpaste instead of Fondant to make these Edible Autumn Leaves
Gumpaste and Fondant are both sugar doughs that are great for making edible cake and cupcake decorations. However, there are some important differences between the two.
Fondant is great for covering cakes and making some decorations. It remains much softer though when making decorations like flowers and leaves. Therefore you will end up with floppy leaves if you use Fondant in this instance.
There are ways to make your fondant a bit stiffer by adding Tylose powder to it. However, I find it still does not compare to using Gumpaste.
Gumpaste leaves will dry out and be quite hard overnight and stay that way. Which is the goal when making these Autumn leaves.
How to work with Gumpaste
I usually just use prepackaged Gumpaste but you can make your own if you want to. This is the link to the Wilton pre made Gumpaste that I use. It can be found at Michaels and Walmart as well.
When you open the package the gumpaste will be quite stiff. Break off a few pieces to knead and soften. (About the size of golf ball is a good start)
As you knead the Gumpaste it will warm up and soften with the heat from your hands. To avoid it from getting too sticky and sticking to your hands I recommend rubbing a little bit of shortening on your hands. You can add more as needed.
Once it’s softened your ready to roll it out and make your leaves!
How to make Autumn Gumpaste Leaves
If you have a silpat mat or fondant mat it will work great for rolling out your Gumpaste so use it. Otherwise make sure you lightly dust your work surface with powdered sugar or corn starch. Either will work well.
Next start by flattening out your Gumpaste a bit with your hand.
How to roll out Gumpaste
Use a rolling pin to roll your Gumpaste out.
You want to roll in one direction when rolling your gumpaste. Make sure you roll away from you.
After a couple of rolls carefully pick your Gumpaste up and turn it. This will help you roll it out more uniformly and as you pick it up you will see if it’s beginning to stick at all. If it is add a bit more confectioner sugar to your surface. Continue rolling and turning gumpaste.
You want to roll your Gumpaste out quite thin. Once you can start seeing your work surface through your gumpaste, it’s ready.
Once the proper thickness is achieved choose the size leaf cutter that you want to use.
This is the assortment of Maple Leaf sizes that came in my set. I used the smallest size this time since I was making my leaves as cupcake toppers. Click here for the Amazon link to similar leaf cutters.
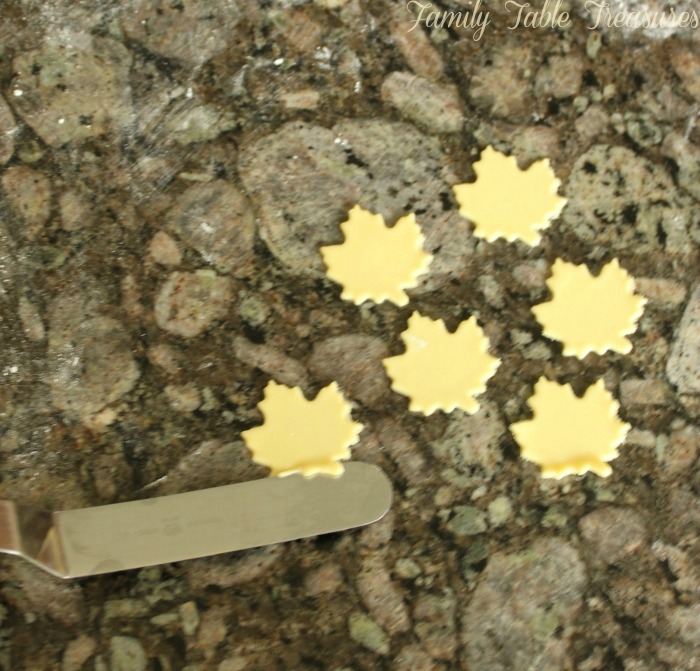
Push your cutter down evenly so it cuts through all the way around your leaf. Then repeat and cut as many leaves as you want.
Gently pull up excess gumpaste and roll into a ball and cover with plastic wrap to prevent it from drying out. It can be used again for another use or roll it out again to make more leaves.
Carefully pick up one of your cut leaves. I like to use an offset spatula to do this. Then place it on a soft pad. I have a special kit for making flowers and leaves that I use. It can also be purchased at Michaels or Walmart. Here is the Amazon link for the one I use.
Make sure you cover the leaves that you’re not working with with plastic wrap to prevent them from drying out. Just lay the plastic wrap right over them.
How to imprint veins into your Gumpaste Leaves
To create the veins in your leaves find a real leaf to use. I just used a rose leaf from the garden. For larger leaves you may need a larger leaf though. I also picked an actual Maple leaf for larger leaves but any leaf will most likely work. If you don’t have any leaves outside of your home then you could always buy something at a florist.
A veining imprinter made for working with fondant and gumpaste also works well but there’e no need to go out and buy one if your don’t have one.
Just line up the leaf to match your Gupaste leaf so that the stem’s line up. Then press all over to imprint the veins into the gumpaste. Be careful not to press so hard that you smush your leaf too much.
You can see how just that little touch of adding the veins makes these leaves look more real already.
How to use a ball tool to thin your Gumpaste Leaves
Using a ball tool to thin the leaf edge will also really make your leaves look a lot more realistic. Gently apply pressure at the edge of the leaf and pull to the center of the leaf. You just want to drag it enough to curl the leaf edge up. Not all the way to the center of the leaf. You can get the idea of what it should look like from this picture. Here’s the link to a similar fondant and gumpaste tool kit that I use.
How to dry your Gumpaste leaves so they aren’t flat
I like to place my leaves around the edge of a paper plate to hold them in place. You don’t want flat leaves. Natural leaves have some curve and movement to them. You can also crumple up aluminum foil and place your leaves on that if you like.
Place your plate somewhere safe overnight. Do not cover them. You want the air to get at them so that they dry out and harden.
How to add color to your Gumpaste Leaves
Once the leaves harden you’re ready to add color to them. To do this you want to have a few clean paint brushes that are only used for food. Don’t use one’s that you’ve used to paint with.
An assortment of color dust is used to brush on the Gumpaste leaves. I used yellow, lime green, orange, red and brown. You can use whatever colors you like. There are hundreds of options you can buy but I had these basic colors from Michaels on hand. Here’s the link to the brand and type of color dust I used.


I usually start with my base color and brush it all over the leaf then add other colors on the edges of the leaf. There’s no wrong way to do this though. You’re the artist here. Make your leaf your own piece of art!

Aren’t they pretty? You’re not done yet though! The next step is not a must but will really bring the colors out.
How to set the color on your Gumpaste Leaves
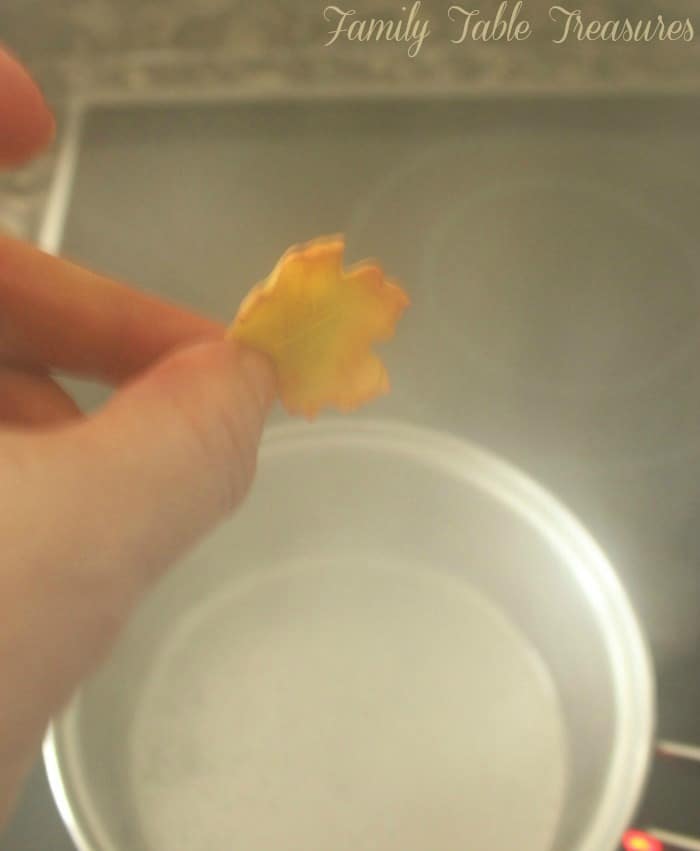
Boil a small pot of water on your stovetop. Once the steam begins to rise carefully hold each leaf above the steam. Careful not to hold it too low, you don’t want to burn your hand!
The moisture from the steam will set the color dust, make it more vibrant and add a nice sheen to your leaves. This will make them appear even more real looking.
At this point you can add your pretty little leaves to cakes, cupcakes, pies or what ever else you want to decorate!
If you want to store them for later use you can place them in an air tight container for several months. That makes them a great make ahead decoration for the holidays!

How to make Autumn Gumpaste Leaves
Ingredients
Items needed to make these leaves
- 1 ,16 ounce package Wilton pre made gumpaste ,you won't use the whole bag
- 1 ,1/2 ounce container Wilton Fondant color dust ,assorted colors, red,brown,green,yellow, and orange, or colors of your choice
- Rolling pin , any type will work
- Maple leaf cookie cutter
- shortening ,to rub on hands to prevent sticking
- confectioner sugar ,to dust work surface
- ball tool for crimping leave edge ,optional
- any type of leaf you can find that will imprint veins into your gumpaste
- assorted clean paint brushes
- paper plate or crumpled up tin foil to dry leaves on
Instructions
How to make Autumn Gumpaste Leaves
- Knead about a golf ball sized piece of gumpaste to soften
- Dust work surface with confectioner sugar or corn starch
- Place gumpaste on work surface and slightly flatten with your hand.
- Roll gumpaste out with rolling pin.
- Roll to about 1/8 inch thickness.
- Press cookie cutter on surface and cut out as many leaves as desired.
- Remove excess gumpaste.
- Carefully lift one leaf off of surface and place on foam pad.
- Place real leaf onto your gumpaste leaf to imprint veins. Press down evenly over leaf surface.
- Remove leaf.
- Use ball tool to crimp edge of leaf.
- Place on paper plate to dry overnight.
- Once leaves are hardened, add color dust to your leaves. Use colors of your choice.
- Bring a small pot of water or tea kettle to a boil. Once steam begins to rise hold leaf over steam...high enough up that you don't scald your fingers...to set the color.
- Lay you leaves out on a paper plate of cookie sheet to dry.
- Decorate you baked goods, pies and cupcakes or store leaves in an air tight container until you are ready to use them.
Notes
How to decorate food with Autumn Gumpaste Leaves
I like to add these Autumn Gumpaste Leaves to cupcakes like the Pumpkin Spice Cupcakes in the picture. They can dress up any cake or pie too for the holidays too.
If you make these make these I’d love to here and see how they come out! Share them on instagram and tag me @Familytabletreasures
Make sure you stop back next week to lear How to make Fondant Pumpkin Cupcake Toppers!


Great easy to understand step by step tutorial. Thanks for sharing this